Perfecting High Hydration 50 Percent Whole Wheat Sourdough

Perfecting High Hydration 50 Percent Whole Wheat Sourdough: A Step-by-Step Guide to Nutritious and Delicious Bread
Hey there, fellow bread enthusiasts! If you’re here, you’re probably as obsessed with sourdough as I am. There’s something magical about creating a loaf of bread that’s not only delicious but also packed with the wholesome goodness of whole wheat. Today, I want to share with you my go-to recipe for perfecting high hydration 50 percent whole wheat sourdough bread. It’s got the perfect balance of nutrition and flavor, and trust me, it’s not as complicated as it sounds. Let’s dive in!
Why 50% Whole Wheat?
Whole wheat flour is packed with fiber, vitamins, and minerals that make your bread healthier and more filling. But let’s be real, 100% whole wheat can be a bit dense. By mixing in some white bread flour, we get the best of both worlds: a loaf that’s light and airy but still has that hearty, wholesome flavor.
I found this article about the health benefits of using freshly milled flour at healthandhomeschool.com
“Fresh milled flour retains more of the nutritional value of the grains it is made from, as the bran and germ of the grains are not removed during processing. This means that fresh milled flour is a good source of fiber, vitamins, and minerals, including iron, magnesium, and potassium. It contains 40 of the 44 nutrients that the human body needs. The things missing are vitamin C, vitamin A, vitamin B12, & the mineral iodine. Additionally, the natural oils in the grains are preserved in the fresh milled flour, which can add flavor and moisture to baked goods. Do a quick search in your favorite search engine to find article after article about the benefits of whole grains. The top 3 issues listed? 1. Heart Disease 2. Type 2 Diabetes 3. Weight Loss. That isn’t information from an off-grid health gurus, that is just from main stream health studies. I could add many other health benefits based on the testimonies of friends & family who have started baking with fresh milled flour. The more we research, the more benefits we find.”
For Perfecting High Hydration 50 Percent Whole Wheat Sourdough You’ll Need:
- 250 grams whole wheat flour
- 250 grams bread flour
- 400-450 grams cold water (80-90% hydration )
- 100 grams active sourdough starter
- 10 grams salt
The Baking Process:
The Milling/Sifting Process:
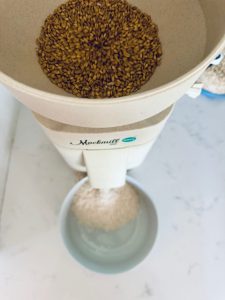
If you have a wheat grinder measure out 250g of soft white or hard white wheat berries.
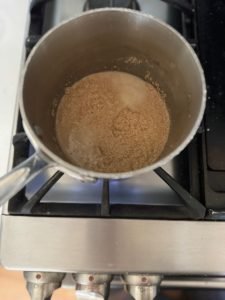
Grind them at the finest setting then sift out the bran and add it to a sauce pan with 200g of filtered water
Heat the bran until it is boiling gently(just a minute or two) then let it cool for 30 minutes while your dough is doing an autolyse.
Step 1: Mix and Autolyse
Mix the whole wheat flour(minus wheat bran), bread flour, and water(250g) in a large bowl until it’s just combined. Then, let it rest for about 30-minutes. This step, called autolyse, lets the flour fully hydrate and makes the dough easier to work with. After 30 minutes add the wheat bran back in and knead with the dough hook for a few minutes or mix by hand until the bran is mixed in well.
Note: Even if you don’t have a wheat grinder your bread will be a lot more fluffy and airy if you sift and scald the bran from your whole wheat flour before adding it to the dough.
Step 2: Add the Starter and Salt
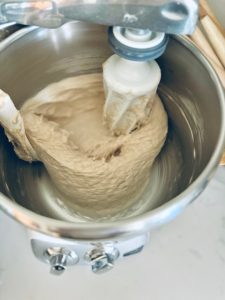
After the autolyse, add your bubbly sourdough starter and salt to the dough. Mix it well until everything’s incorporated with a dough hook on your mixer or by hand. Now, it’s time to stretch and fold.
Stretch and Fold:
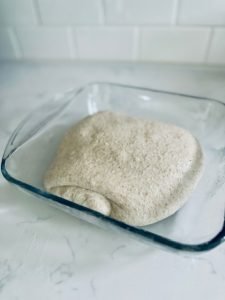
Next, you want to stretch and fold your dough to help the gluten do its thang! Basically, you grab a portion of dough, pull it up toward you, stretching it without tearing, then rotate the bowl and do it again. Make two or three passes around the bowl. This should only take about five minutes. Dump it into a 9×9 glass Pyrex dish and cover it with plastic wrap or a wet tea towel and place it in your warm spot again for 45 minutes.
Step 3: Coil Folds
Now that the dough has rested and relaxed from your stretch and fold, it’s time to move on to coil folds. They are super simple and take even less time! To do this, lift the dough gently up from the middle and let the dough fall under itself. Do this on all four sides of the dish. Ideally, the dough should start to take on the shape of a log. Cover and let it rest another 45 minutes in your warm spot.
Do one-two more sets of coil folds and watch your aliquot jar carefully. When your dough is holding a tight log shape and the dough in your jar has doubled in size, you are ready to shape the dough and put it into the fridge overnight.
Step 4: Shaping the Dough
After your final coil fold and a good rise, it’s time to shape your dough. Flour your work surface and gently shape the dough into a round or oval loaf. Place it in a floured proofing basket or a bowl lined with a floured kitchen towel.
Step 5: Final Proof
For an even better flavor, you can place it in the fridge for a slow cold fermentation for 12-24 hours. The longer it proofs, the better the flavor and the lower the gluten(95-97% gluten free!)

Step 6: Bake
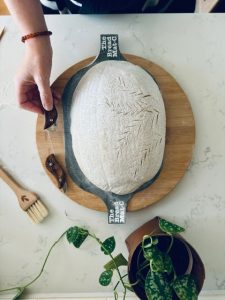
Preheat your oven to 500°F (260°C) with a Dutch oven inside. Once it’s hot, carefully transfer your dough to the Dutch oven. Dust with rice flour/bread flour and score the top with a lame to let it expand while baking. Bake with the lid on for 30 minutes, then remove the lid and bake for another 5-10 minutes until the crust is a deep golden brown and the internal temperature reaches around 205°F (96°C).
Step 7: Cool and Enjoy
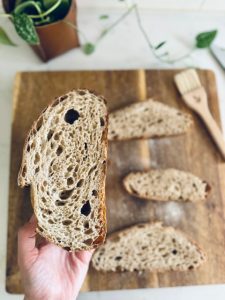
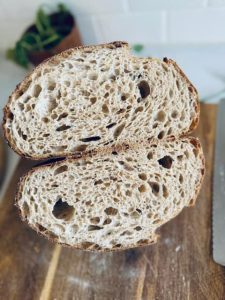
Let the bread cool on a wire rack for at least an hour before slicing. This is the hardest part, but it’s worth the wait. Once it’s cool, slice it up and enjoy the perfect blend of tangy sourdough flavor and hearty whole wheat goodness.
Tips for Success:
- Active Starter: Make sure your starter is bubbly and active before you use it.
- Hydration: Whole wheat flour absorbs more water, so don’t be afraid to adjust the water content to get a slightly sticky dough.
- Fermentation Time: Watch the dough, not the clock. Dough behavior can vary with temperature and starter strength.
- Scoring: Proper scoring helps your bread expand nicely in the oven.
- Practice: Each loaf you bake makes you better. Don’t worry if it’s not perfect at first – every loaf is a learning experience.
- Don’t forget to scald the bran: This will give you a much fluffier loaf.
And there you have it! A delicious, nutritious high hydration 50% whole wheat sourdough bread that’s sure to impress.
Happy baking, friends!